Thursday, January 27, 2011

Visual Journal Class Week 2

Last week I published a post on a free Visual Journaling class I am participating in through strathmoreartists.com. One nice feature of these classes is that I can work at my own pace. Even though we are already on week 4 of the classes, and I am only on week 2 of the work it's OK. No deadlines, no pressure, no stress. That's the kind of project with which I can live!
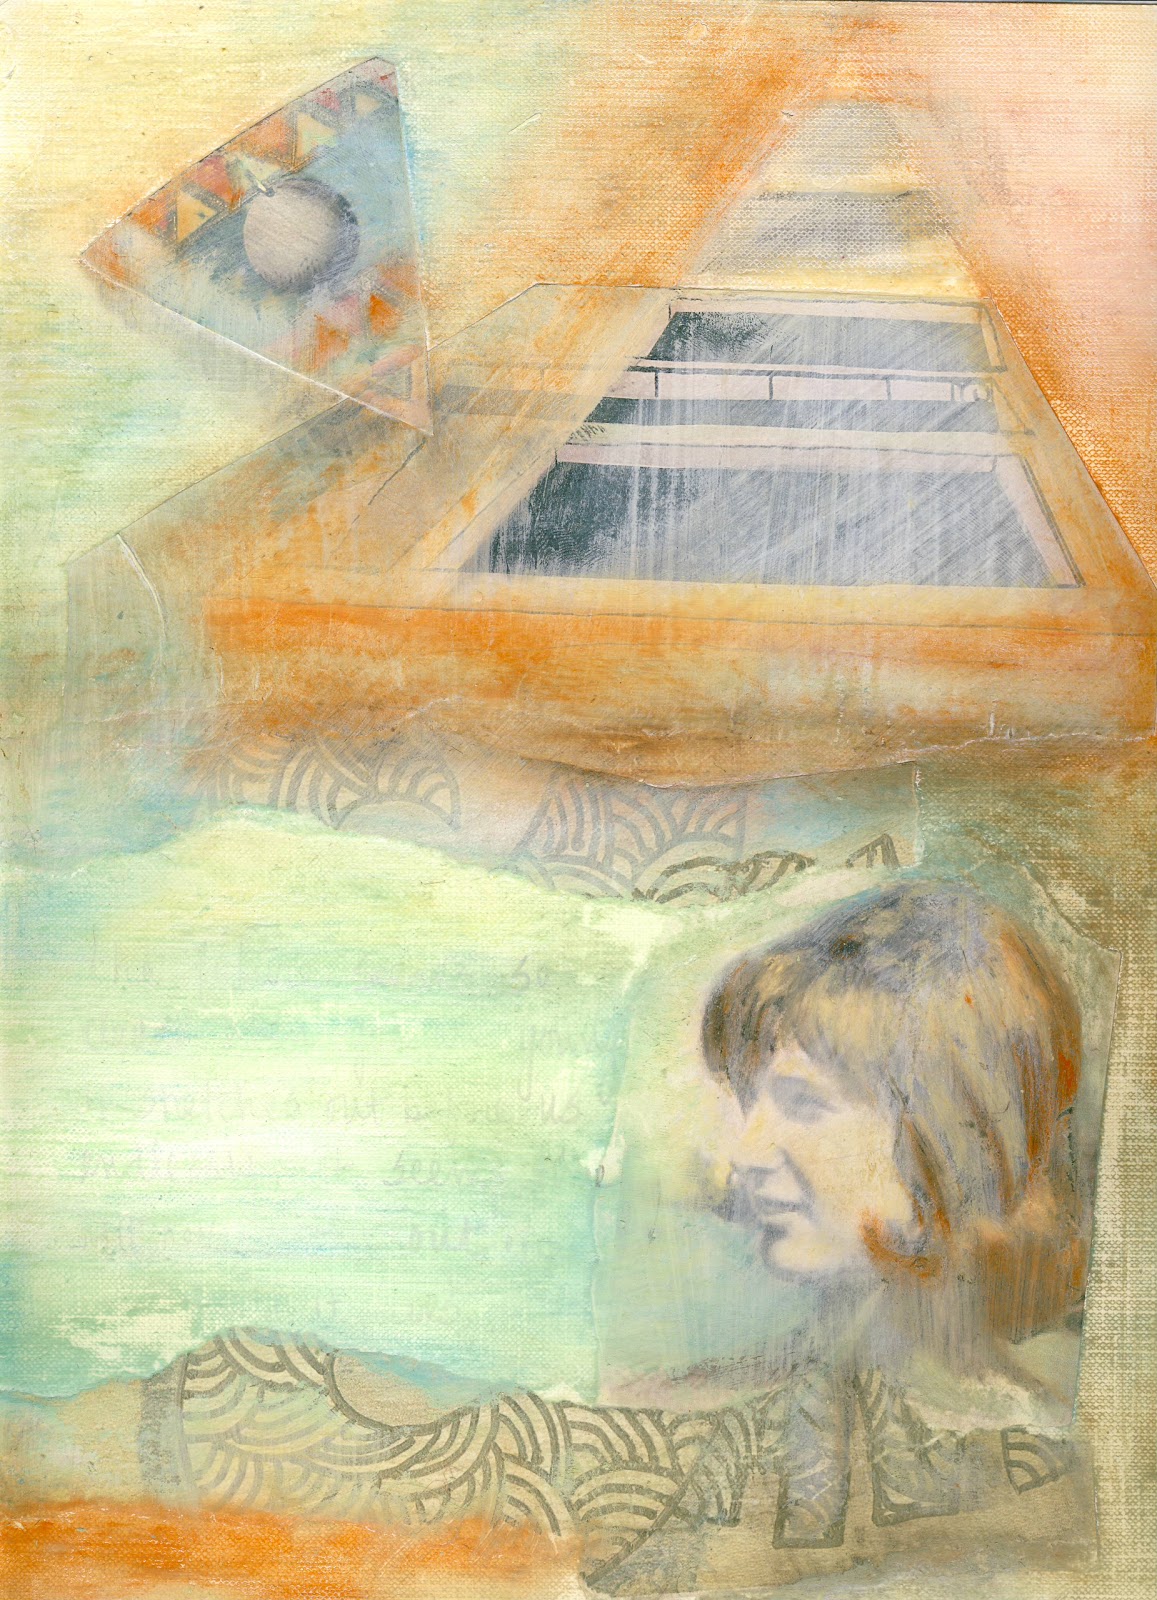
On the second week we were to add shading, color and paint to our projects. Using a charcoal pencil we added shading beneath elements in which we wanted to enhance the shadows. Then using 3 or 4 shades of oil pastel we were to color and blend in areas of our collage. Finally, we used a gesso white wash to overpaint the entire piece. Then back again with more shading and color.

Tuesday, January 25, 2011

Dotee Dolls

Engaging with others in mail art swaps is one of my favorite pastimes. I usually pick one or two a month to participate in on a site called artfortytwo.org. The swaps are varied, the art well done, and the people nice. Another advantage of  the Art 42 group is that I am not required to purchase any special products to participate in the swaps. Everyone works pretty much with the products they have on hand already. I like this because it often allows me to use new techniques or products I have been wanting to try out. Most of the swaps I engage in are collaged or painted ATC's, chunky pages, or things of that nature.
However, one different sort of a swap caught my attention -Dotee dolls. Now what in the world are Dotee dolls?, I thought. Well, as it turns out, Dotee Dolls are an altered art doll created by Dot of http://dotslifeandart.blogspot.com Since then they have become a swap sensation and they are as varied and different as they are fun. The pair I made for the swap were to be a Winter Dotee doll and a Spring Dotee doll. Here they are - the Snow Angel and the Spring Sprout. I must admit I had a hard time parting with them but send them off I did and these pics are all I have left.

Many sites and blogs post detailed instructions for making a dottee doll but here are the basics.
1. Find some fabric you love for the body. Cut it out in any shape of your choosing. I have seen pear shapes, rectangles, triangles. Find a ribbon to use for hanging the dottee doll. The ribbon is folded in half  with the loop sticking out the top of the doll and the tail hanging out the bottom of the doll.  Attach the ribbon to the front inside of the body. The doll will be anywhere from about 3-5 inches long.
2. Using felt of any color cut out a face shape. Draw, paint, sew or bead on the facial features, then sew the face to the front side of the front of the body.
3. Stitch the two body parts together. Hand stitching is easy to do on these dolls. They can be sewn right sides together and turned inside out so the stitching does not show, or sewn wrong sides together with the seams to the outside. Again it depends on your preference.
4. Embellish the doll as you choose. You may add clothing, beads, hair. The sky's the limit! 

Friday, January 21, 2011

Free Classes in Visual Journaling

Last year one of my goals as an artist was to try to advance my own creativity in the areas of drawing, collage, and mixed media. I  joined swap groups and created collaged ATC's, Chunky Book Pages, and Tip-In pages. Still trying to find my own voice I am venturing into the area of visual journaling. I think keeping an visual journal can make your art more personal, helping you to develop your own style. It can document your life, your travels, your artistic growth. As with any journal or diary it can be a daunting process as well.  Somehow staring down a white page has never been a very comfortable experience for me. Many artist begin with "toning" or adding a wash of color onto the page before beginning, or choosing paper which already has a tone of color on it. It can still be a very large, blank page and while I have found working on a very small scale can be less intimidating it is also somewhat confining. So when I saw that Strathmore was offering free classes online in Visual Journaling I was excited! I signed up and began a type of "pages in stages" workshop using copies of my own previous artwork and a few other simple techniques. At any rate it is all about having fun and being free. So jump in at http://www.strathmoreartist.com/. Here is my page after Week 1:

Thursday, January 20, 2011

Brrrr.......

January may have come in warm and snowy but it is going out cold and blowy! Subzero temperatures have finally come home this week. A great time to stay inside and make those February valentines. Reflecting back to when my boys were young I thought of how we would always make Valentine's to give others. Usually flat, about the size of baseball card, we would paint and color them one Saturday afternoon. After they had signed each one (a laborious process), we would staple a bag of candy or a lollipop onto each card. For some reason over the years an extra treat had become a part of the giveaway. When I was growing up we were happy to get the little cartoon based cards from all of our class- mates. Nowadays specially packaged candy is the Valentine!  Some marketing genious, I suppose. But I must admit I am still a sucker for the homemade with love variety.


And so... I have been playing around with Tim Holz's alcohol inks again for a valentine swap on artfortytwo.org. Alchol inks are solvent inks which adhere to any non-porous surface.  They can be used to color metal, dominos, glossy card stock, glass, etc. I am always discovering a new use for them. They are just so versatile and colorful, as well as quick and easy. Inspired by an article in the December issue of Cloth, Paper, Scissors I thought these little ATC's would look perfect mounted upon a card. They can be removed and hung up on their own as an ornament or picture frame. I love the look of the alcohol inks on the metallic foil tape on the sides of the card.

So with Make and Take coming up on January 24th at Swift Weaver's I decided a Valentine's project was just what the weather ordered. At left is a card designed by Swift Weavers' intern Diedre Ranney. We hope to see how you can inspire us with your own designs and ideas. We'll be here Monday night from 6 p.m. to 9 p.m or email us your own valentine creations at dianetrew@yahoo.com.  


Sunday, January 2, 2011

Happy New Year!

Well the new year started off with a  bang at the Benson Golf Course. We had a whopping 120 people for dinner on New Year's Eve! Wow! Thanks to everyone who came. It is a real labor of love because some of the members and myself get together to cook and make it a special dinner for everyone who comes out. Don't you just love Kay's pinecone cheese balls, and the mini mice were a new treat for this year. All the food was outstanding: Rick's soup and ribs, Bill's brined chicken, Kay's sauteed shrimp, the prime rib and last but not least Anne's awesome cream puffs.
There is nothing like starting out the new year with good food and good friends!

Another new year project for me is cleaning my space at Swift Weaver's. What a job! I just don't know where anything is anymore and a thorough shake down is a must. So I will be spending the next few days revamping, recycling, redoing!

The Sketchbook Challenge has begun with the new year also. I have never been an artist to art journal or sketch overly much. I have books full of ideas and colors and thoughts on different projects but I am going to enter this challenge with the idea of exercising my drawing skills and expanding my creativity. You can find the sketchbook challenge here at http://www.sketchbookchallenge.blogspot.com/. There is also a badge on my right sidebar which will lead you there. Jump in and start sketching!

Make and Take is coming up this month on the 24th and I think I will be making journals or sketchbooks - whichever you wish it to be. I will be posting a sample picture in a week or so. So off to a busy start for 2011. Happy New Year to everyone!